Low Effort Twin Furies Hard Mode
imported>PvME corpus import Attributed pinned PvME snapshot 074a9438f79d10fba75735791be0030734db8b5e; CC BY-NC-SA 4.0 |
Update source attribution; preserve PvME guide content |
||
| (One intermediate revision by the same user not shown) | |||
| Line 1: | Line 1: | ||
__NOTOC__ | |||
<div class="pvme-exact-guide"> | |||
< | <h1 id="low-effort-twin-furies-hard-mode" class="pvme-source-title"><nowiki>Low Effort Twin Furies Hard Mode</nowiki></h1> | ||
< | |||
<nowiki> | <nowiki> | ||
</nowiki><p>< | </nowiki> | ||
<p class="pvme-source-line"><pvme-image src="https://img.pvme.io/images/gaIHwzHbTa.png" alt="" title="" kind="media" /></p> | |||
<nowiki> | <nowiki> | ||
</nowiki><p><nowiki> | </nowiki> | ||
<p class="pvme-source-line pvme-source-spacer"><nowiki></nowiki></p> | |||
<nowiki> | <nowiki> | ||
</nowiki></ | </nowiki> | ||
<div class="pvme-source-section"> | |||
<h2 id="disclaimer_1"><ins><nowiki>Disclaimer</nowiki></ins></h2> | |||
<nowiki> | <nowiki> | ||
</nowiki><p><nowiki> | </nowiki> | ||
<p class="pvme-source-line"><nowiki>⬥ </nowiki><strong><nowiki>IF YOU CANNOT GET A METHOD TO WORK </nowiki><ins><nowiki>DO NOT</nowiki></ins><nowiki> MESSAGE THE CREATOR(S)</nowiki></strong></p> | |||
<nowiki> | <nowiki> | ||
</nowiki>< | </nowiki> | ||
<p class="pvme-source-line pvme-source-detail"><nowiki> • It is </nowiki><strong><nowiki>more than likely </nowiki><ins><nowiki>user error</nowiki></ins><nowiki> or </nowiki><ins><nowiki>cutting corners</nowiki></ins></strong><nowiki>, use </nowiki><span><nowiki>#pvm-help</nowiki></span><nowiki> if you cannot get it to work</nowiki></p> | |||
<nowiki> | <nowiki> | ||
</nowiki><p><nowiki></nowiki></p> | </nowiki> | ||
<p class="pvme-source-line pvme-source-spacer"><nowiki></nowiki></p> | |||
<nowiki> | <nowiki> | ||
</nowiki>< | </nowiki> | ||
<div class="pvme-source-mechanic"> | |||
<h3 id="positioning"><nowiki>Positioning</nowiki></h3> | |||
<nowiki> | <nowiki> | ||
</nowiki><p>< | </nowiki> | ||
<p class="pvme-source-line"><pvme-image src="https://img.pvme.io/images/aUgyiBY2Gn.png" alt="" title="" kind="media" /></p> | |||
<nowiki> | <nowiki> | ||
</nowiki> | </nowiki> | ||
</div> | |||
<div class="pvme-source-mechanic"> | |||
<h3 id="notes"><nowiki>Notes</nowiki></h3> | |||
<nowiki> | <nowiki> | ||
</nowiki><p><nowiki> | </nowiki> | ||
<p class="pvme-source-line"><nowiki>⬥ As long as your conjures teleport to you, you do not need to be on the exact starting tile.</nowiki></p> | |||
<nowiki> | <nowiki> | ||
</nowiki>< | </nowiki> | ||
<p class="pvme-source-line"><nowiki>⬥ Your conjures will not teleport to you if you are south of the starting tile.</nowiki></p> | |||
<nowiki> | <nowiki> | ||
</nowiki><p> | </nowiki> | ||
<p class="pvme-source-line"><nowiki>⬥ Once your conjures have teleported inside the arena, you do not need to move for the rest of the fight.</nowiki></p> | |||
<nowiki> | <nowiki> | ||
</nowiki>< | </nowiki> | ||
<p class="pvme-source-line pvme-source-spacer"><nowiki></nowiki></p> | |||
<nowiki> | <nowiki> | ||
</nowiki>< | </nowiki> | ||
</div> | |||
</div> | |||
<div class="pvme-source-section"> | |||
<h2 id="necromancy-low-effort-method"><ins><nowiki>Necromancy Low Effort Method</nowiki></ins></h2> | |||
<nowiki> | <nowiki> | ||
</nowiki | </nowiki> | ||
<div class="pvme-source-mechanic"> | |||
<h3 id="overview"><nowiki>Overview</nowiki></h3> | |||
< | |||
<nowiki> | <nowiki> | ||
</nowiki><div><nowiki> | </nowiki> | ||
<div><nowiki> | |||
</nowiki><div><nowiki> | </nowiki><div><nowiki> | ||
</nowiki><div><nowiki> | </nowiki><div><nowiki> | ||
| Line 54: | Line 74: | ||
</nowiki><div><nowiki> | </nowiki><div><nowiki> | ||
</nowiki><div></div> | </nowiki><div style="background-color: rgb(0, 153, 255)"></div><nowiki> | ||
<nowiki> | |||
</nowiki><div><nowiki> | </nowiki><div><nowiki> | ||
</nowiki><div><nowiki> | </nowiki><div><nowiki> | ||
| Line 61: | Line 80: | ||
</nowiki><div | </nowiki><div class="pvme-source-preserve-lines"><nowiki>⬥ The following </nowiki><strong><nowiki>ARE REQUIRED</nowiki></strong><nowiki> for this method to work: | ||
• </nowiki><strong><nowiki>Cutting corners will result in failure</nowiki></strong><nowiki> | • </nowiki><strong><nowiki>Cutting corners will result in failure</nowiki></strong><nowiki> | ||
• A more extensive list can be found in </nowiki> | • A more extensive list can be found in </nowiki><span><nowiki>#unknown-channel</nowiki></span><nowiki> | ||
</nowiki></div> | </nowiki></div><nowiki> | ||
<nowiki> | |||
</nowiki><div><div><div><u><nowiki>Items</nowiki></u><nowiki> | </nowiki><div><div><div><u><nowiki>Items</nowiki></u><nowiki> | ||
</nowiki></div> | </nowiki></div><div class="pvme-source-preserve-lines"><nowiki>⬥ </nowiki>[https://runescape.wiki/w/Igneous_Kal-Mor <nowiki>Igneous Kal-Mor</nowiki>]<nowiki> </nowiki><pvme-image src="https://cdn.discordapp.com/emojis/1139200072438005851.png?v=1" alt="igneouskalmor" title="igneouskalmor" kind="icon" /><nowiki> | ||
<div | ⬥ </nowiki>[https://runescape.wiki/w/Scripture_of_Jas <nowiki>Scripture of Jas</nowiki>]<nowiki> </nowiki><pvme-image src="https://cdn.discordapp.com/emojis/869284342839513108.png?v=1" alt="scriptureofjas" title="scriptureofjas" kind="icon" /><nowiki> | ||
⬥ </nowiki>[https://runescape.wiki/w/Scripture_of_Jas <nowiki>Scripture of Jas</nowiki>]<nowiki> </nowiki> | ⬥ </nowiki>[https://runescape.wiki/w/Enhanced_Excalibur <nowiki>Enhanced excalibur</nowiki>]<nowiki> </nowiki><pvme-image src="https://cdn.discordapp.com/emojis/513200949016264727.png?v=1" alt="enhancedexcalibur" title="enhancedexcalibur" kind="icon" /><nowiki> | ||
⬥ </nowiki>[https://runescape.wiki/w/Enhanced_Excalibur <nowiki>Enhanced excalibur</nowiki>]<nowiki> </nowiki> | ⬥ </nowiki>[https://runescape.wiki/w/Attuned_portent_of_restoration_X <nowiki>Attuned Portent of Restoration X</nowiki>]<nowiki> </nowiki><pvme-image src="https://cdn.discordapp.com/emojis/1027212535121850400.png?v=1" alt="attunedportentofrestorationx" title="attunedportentofrestorationx" kind="icon" /><nowiki> | ||
⬥ </nowiki>[https://runescape.wiki/w/Attuned_portent_of_restoration_X <nowiki>Attuned Portent of Restoration X</nowiki>]<nowiki> </nowiki> | ⬥ </nowiki>[https://runescape.wiki/w/Ring_of_death <nowiki>Ring of death</nowiki>]<nowiki> </nowiki><pvme-image src="https://cdn.discordapp.com/emojis/513190159462825984.png?v=1" alt="rod" title="rod" kind="icon" /><nowiki> | ||
⬥ </nowiki>[https://runescape.wiki/w/Ring_of_death <nowiki>Ring of death</nowiki>]<nowiki> </nowiki> | </nowiki></div></div><div><div><u><nowiki>Abilities</nowiki></u><nowiki> | ||
</nowiki></div> | </nowiki></div><div class="pvme-source-preserve-lines"><nowiki>⬥ </nowiki>[https://runescape.wiki/w/Darkness <nowiki>Darkness</nowiki>]<nowiki> </nowiki><pvme-image src="https://cdn.discordapp.com/emojis/1137809209782698024.png?v=1" alt="darkness" title="darkness" kind="icon" /><nowiki> | ||
</div> | ⬥ </nowiki>[https://runescape.wiki/w/Conjure_Undead_Army <nowiki>Conjure Undead Army</nowiki>]<nowiki> </nowiki><pvme-image src="https://cdn.discordapp.com/emojis/1166094935066423348.png?v=1" alt="conjurearmy" title="conjurearmy" kind="icon" /><nowiki> | ||
<div><div><u><nowiki>Abilities</nowiki></u><nowiki> | </nowiki></div></div><div><div><u><nowiki>Other</nowiki></u><nowiki> | ||
</nowiki></div> | </nowiki></div><div class="pvme-source-preserve-lines"><nowiki>⬥ Thermal Bath and Bonfire HP boost | ||
<div | |||
⬥ </nowiki>[https://runescape.wiki/w/Conjure_Undead_Army <nowiki>Conjure Undead Army</nowiki>]<nowiki> </nowiki> | |||
</nowiki></div> | |||
</div> | |||
<div><div><u><nowiki>Other</nowiki></u><nowiki> | |||
</nowiki></div> | |||
<div | |||
• Wearing HP boosting equipment when you get your bonfire boost will increase the amount of bonus health received from the bonfire | • Wearing HP boosting equipment when you get your bonfire boost will increase the amount of bonus health received from the bonfire | ||
⬥ </nowiki>[https://runescape.wiki/w/Death_Ward <nowiki>Death Ward Relic</nowiki>]<nowiki> </nowiki> | ⬥ </nowiki>[https://runescape.wiki/w/Death_Ward <nowiki>Death Ward Relic</nowiki>]<nowiki> </nowiki><pvme-image src="https://cdn.discordapp.com/emojis/697808774068699286.png?v=1" alt="deathward" title="deathward" kind="icon" /><nowiki> | ||
⬥ </nowiki>[https://runescape.wiki/w/Hellhound_(familiar) <nowiki>Hellhound familiar</nowiki>]<nowiki> </nowiki> | ⬥ </nowiki>[https://runescape.wiki/w/Hellhound_(familiar) <nowiki>Hellhound familiar</nowiki>]<nowiki> </nowiki><pvme-image src="https://cdn.discordapp.com/emojis/921410226475925514.png?v=1" alt="hellhoundpouch" title="hellhoundpouch" kind="icon" /><nowiki> | ||
</nowiki></div> | </nowiki></div></div></div><nowiki> | ||
</ | </nowiki></div><nowiki> | ||
</div> | |||
<nowiki> | </nowiki></div><nowiki> | ||
</nowiki></div> | |||
</nowiki></div></div></div></div></div></div></div></div></div></div></div></div> | |||
<nowiki> | <nowiki> | ||
</nowiki></ | </nowiki> | ||
<p class="pvme-source-line pvme-source-spacer"><nowiki></nowiki></p> | |||
<nowiki> | <nowiki> | ||
</nowiki> | |||
</div> | </div> | ||
</div> | </div> | ||
<div class="pvme-source-section" data-gear="true"> | |||
<h2 id="presets-and-relics"><ins><nowiki>Presets and Relics</nowiki></ins></h2> | |||
<nowiki> | <nowiki> | ||
</nowiki> | |||
</nowiki>< | <p class="pvme-source-line"><nowiki>⬥ </nowiki>[https://presets.pvme.io/?id=BLoWoFuGnnvkDCNYybyc <nowiki>Necromancy - T95</nowiki>]<nowiki> </nowiki><pvme-image src="https://cdn.discordapp.com/emojis/1148995625896120460.png?v=1" alt="necromancy" title="necromancy" kind="icon" /></p> | ||
<nowiki> | <nowiki> | ||
</nowiki>< | </nowiki> | ||
<p class="pvme-source-line"><nowiki> | |||
</nowiki><pvme-image src="https://firebasestorage.googleapis.com/v0/b/preset-images/o/images%2FBLoWoFuGnnvkDCNYybyc.png?alt=media" alt="" title="" kind="media" /></p> | |||
<nowiki> | <nowiki> | ||
</nowiki>< | </nowiki> | ||
<div class="pvme-source-mechanic"> | |||
<h3 id="action-bar"><nowiki>Action Bar</nowiki></h3> | |||
<nowiki> | <nowiki> | ||
</nowiki><p>< | </nowiki> | ||
<p class="pvme-source-line"><pvme-image src="https://img.pvme.io/images/KeJfgi6rKX.png" alt="" title="" kind="media" /><nowiki> | |||
</nowiki></p> | |||
<nowiki> | <nowiki> | ||
</nowiki><h3 id=" | </nowiki> | ||
</div> | |||
<div class="pvme-source-mechanic"> | |||
<h3 id="the-fight"><nowiki>The fight</nowiki></h3> | |||
<nowiki> | <nowiki> | ||
</nowiki><p | </nowiki> | ||
<p class="pvme-source-line"><nowiki>⬥ This method requires teleporting to War's Retreat after every kill to replenish prayer, adrenaline, familiar and player health, and reset cooldowns.</nowiki></p> | |||
<nowiki> | <nowiki> | ||
</nowiki>< | </nowiki> | ||
<p class="pvme-source-line pvme-source-sequence"><nowiki>⬥ Outside of the instance </nowiki><pvme-image src="https://cdn.discordapp.com/emojis/1166094935066423348.png?v=1" alt="conjurearmy" title="conjurearmy" kind="icon" /><nowiki> → Rejoin instance → Enter boss room + </nowiki><pvme-image src="https://cdn.discordapp.com/emojis/1159434409913634816.png?v=1" alt="commandghost" title="commandghost" kind="icon" /><nowiki> → </nowiki><pvme-image src="https://cdn.discordapp.com/emojis/535533810004262912.png?v=1" alt="surge" title="surge" kind="icon" /><nowiki> or </nowiki><pvme-image src="https://cdn.discordapp.com/emojis/1049378668197195808.png?v=1" alt="dive" title="dive" kind="icon" /><nowiki> north → wait for boss timer to appear → (tc) </nowiki><pvme-image src="https://cdn.discordapp.com/emojis/1179505729367969863.png?v=1" alt="deathskullsigneous" title="deathskullsigneous" kind="icon" /></p> | |||
<nowiki> | <nowiki> | ||
</nowiki><p><nowiki>⬥ | </nowiki> | ||
<p class="pvme-source-line"><nowiki>⬥ If you are not using the complete First Necromancer's robe set then use </nowiki><pvme-image src="https://cdn.discordapp.com/emojis/1137809128136388819.png?v=1" alt="lifetransfer" title="lifetransfer" kind="icon" /><nowiki> after </nowiki><pvme-image src="https://cdn.discordapp.com/emojis/1166094935066423348.png?v=1" alt="conjurearmy" title="conjurearmy" kind="icon" /></p> | |||
<nowiki> | <nowiki> | ||
</nowiki><p><nowiki>⬥ | </nowiki> | ||
<p class="pvme-source-line"><nowiki>⬥ Your target cycle should be targeting Nymora at the beginning of the fight, not Avaryss. This is because attacking Avaryss while she is dashing will cause her to reflect 90% of the damage dealt. If you target cycle onto Avaryss you are doing it too late and should adjust accordingly.</nowiki></p> | |||
<nowiki> | <nowiki> | ||
</nowiki><p><nowiki>⬥ | </nowiki> | ||
<p class="pvme-source-line"><nowiki>⬥ On the 4th and final push from Avaryss (from the North East corner to the North West corner) switch targets and attack Avaryss for the rest of the fight + activate </nowiki><pvme-image src="https://cdn.discordapp.com/emojis/513200949016264727.png?v=1" alt="enhancedexcalibur" title="enhancedexcalibur" kind="icon" /><nowiki> + optionally </nowiki><pvme-image src="https://cdn.discordapp.com/emojis/655341074235129858.png?v=1" alt="vulnbomb" title="vulnbomb" kind="icon" /></p> | |||
<nowiki> | <nowiki> | ||
</nowiki><p><nowiki>⬥ | </nowiki> | ||
<p class="pvme-source-line"><nowiki>⬥ It is not recommended to click on Nymora to start attacking. Due to the delay compared to target cycling, if you click to start the fight, your Death Skulls will lose bounces before Avaryss begins to dash around the arena.</nowiki></p> | |||
<nowiki> | <nowiki> | ||
</nowiki><p | </nowiki> | ||
<p class="pvme-source-line pvme-source-spacer"><nowiki></nowiki></p> | |||
<nowiki> | <nowiki> | ||
</nowiki> | </nowiki> | ||
< | |||
< | </div> | ||
<div class="pvme-source-mechanic"> | |||
<h3 id="example-kills"><nowiki>Example Kills</nowiki></h3> | |||
<nowiki> | <nowiki> | ||
</nowiki>< | </nowiki> | ||
<p class="pvme-source-line"><nowiki>⬥ </nowiki>[https://www.youtube.com/watch?v=n13uGkrGL7E <nowiki>Example kills</nowiki>]</p> | |||
<nowiki> | <nowiki> | ||
</nowiki>< | </nowiki> | ||
<pvme-embed src="https://www.youtube.com/embed/n13uGkrGL7E" title="" allowfullscreen="1" /> | |||
<nowiki> | <nowiki> | ||
</nowiki><p><nowiki></nowiki></p> | </nowiki> | ||
<p class="pvme-source-line pvme-source-spacer"><nowiki></nowiki></p> | |||
<nowiki> | <nowiki> | ||
</nowiki><p><nowiki>Content Provided by: @ladygoogoogaga</nowiki></p> | </nowiki> | ||
<p class="pvme-source-line"><nowiki>Content Provided by: @ladygoogoogaga</nowiki></p> | |||
<nowiki> | <nowiki> | ||
</nowiki><p><nowiki>Formatting Maintained by: @ladygoogoogaga</nowiki></p> | </nowiki> | ||
<p class="pvme-source-line"><nowiki>Formatting Maintained by: @ladygoogoogaga</nowiki></p> | |||
<nowiki> | <nowiki> | ||
</nowiki><p><nowiki></nowiki></p> | </nowiki> | ||
<p class="pvme-source-line pvme-source-spacer"><nowiki></nowiki></p> | |||
<nowiki> | <nowiki> | ||
</nowiki> | </nowiki> | ||
</div> | |||
</div> | |||
</div> | |||
<div class="pvme-source-attribution">[https://pvme.io/pvme-guides/afk/low-effort-twin-furies-hardmode/ PvME source] · PvME contributors · [https://creativecommons.org/licenses/by-nc-sa/4.0/ CC BY-NC-SA 4.0]. | |||
</div> | |||
Latest revision as of 02:35, 16 November 2026
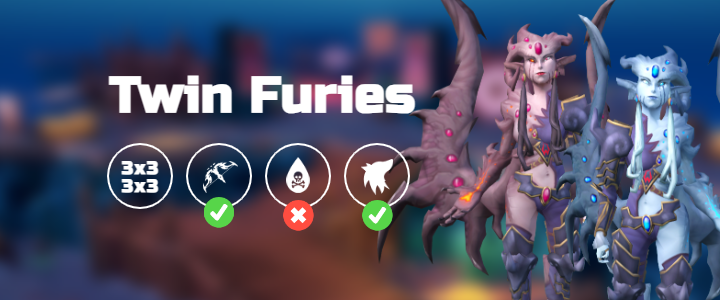
Low Effort Twin Furies Hard Mode
Disclaimer
⬥ IF YOU CANNOT GET A METHOD TO WORK DO NOT MESSAGE THE CREATOR(S)
• It is more than likely user error or cutting corners, use #pvm-help if you cannot get it to work
Positioning

Notes
⬥ As long as your conjures teleport to you, you do not need to be on the exact starting tile.
⬥ Your conjures will not teleport to you if you are south of the starting tile.
⬥ Once your conjures have teleported inside the arena, you do not need to move for the rest of the fight.
Necromancy Low Effort Method
Overview
 ⬥
 ⬥
 ⬥

 ⬥
 ⬥ Hellhound familiar

Presets and Relics


Action Bar

The fight
⬥ This method requires teleporting to War's Retreat after every kill to replenish prayer, adrenaline, familiar and player health, and reset cooldowns.
⬥ Outside of the instance  → Rejoin instance → Enter boss room +
 →
 or
 north → wait for boss timer to appear → (tc)

⬥ If you are not using the complete First Necromancer's robe set then use  after
⬥ Your target cycle should be targeting Nymora at the beginning of the fight, not Avaryss. This is because attacking Avaryss while she is dashing will cause her to reflect 90% of the damage dealt. If you target cycle onto Avaryss you are doing it too late and should adjust accordingly.
⬥ On the 4th and final push from Avaryss (from the North East corner to the North West corner) switch targets and attack Avaryss for the rest of the fight + activate  + optionally

⬥ It is not recommended to click on Nymora to start attacking. Due to the delay compared to target cycling, if you click to start the fight, your Death Skulls will lose bounces before Avaryss begins to dash around the arena.
Example Kills
Content Provided by: @ladygoogoogaga
Formatting Maintained by: @ladygoogoogaga