Amascut 2000% Ranged-Melee (Hybrid DPS) <img src="https://cdn.discordapp.com/emojis/580168050121113623.png?v=1" alt="range" title="range" class="pvme-source-icon"> <img src="https://cdn.discordapp.com/emojis/1096130867279171706.png?v=1" alt="melee" title="melee" class="pvme-source-icon">
AI-assisted additive formatting; current PvME source words, order and media preserved |
Update source attribution; preserve PvME guide content |
||
| Line 385: | Line 385: | ||
</div> | </div> | ||
<div class="pvme-source-attribution">[https://pvme.io/pvme-guides/rs3-full-boss-guides/amascut/amascut-2000-ranged-melee-dps/ PvME source] · PvME contributors · [https://creativecommons.org/licenses/by-nc-sa/4.0/ CC BY-NC-SA 4.0] | <div class="pvme-source-attribution">[https://pvme.io/pvme-guides/rs3-full-boss-guides/amascut/amascut-2000-ranged-melee-dps/ PvME source] · PvME contributors · [https://creativecommons.org/licenses/by-nc-sa/4.0/ CC BY-NC-SA 4.0]. | ||
</div> | </div> | ||
Latest revision as of 02:36, 16 November 2026
Amascut 2000% Ranged-Melee (Hybrid DPS) 

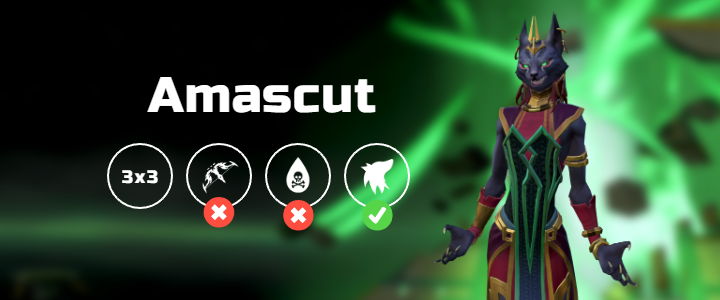
Introduction
This is an advanced guide which assumes a strong underlying knowledge of all mechanics and information presented in #unknown-channel and #unknown-channel.
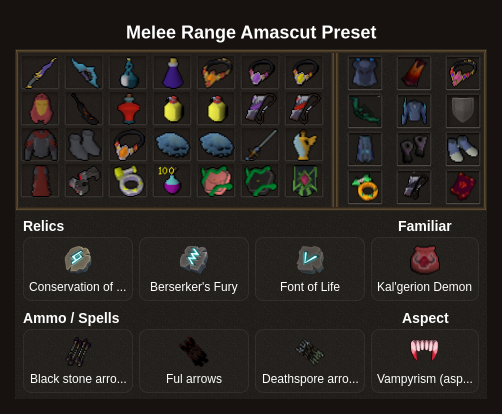
Rotations
Wars
s
 or
 → s


Phase 1
4pc  +
 camp can swap gloves after
r ( ) + →  →
 →

 →
 → (
 )
 →
 → (
 ) after 3 hits → →
 → → → → (+
 if 53% after ) →
 → → → → →
 (+ if not used yet) →
 →
 → (tc
 )
Notes:
⬥ If your starts are consistently under 30 seconds from stalling on  you can on and s → r → on

⬥ do  → → after the last for more consistent BTK skips
Phase 2 and 3
(tc ) +  →

 → (
 )
(tc  ) +
 →
 →
 →

Faster Variation:
 + (tc ) +
 →
 →
West Chains:
In Middle chain:  →
Both Side chains: → →
East Chains:
Side chains:  → →
Middle chain: /
Middle chain (Solo): s → r + 
Modest Crocodile
Out Role: Click +  Statue closer to
Out Role: (tc  ) + Lower to 40k → +
 → → → (Build to 100%)
In Role: (tc ) + → (tc ) + →  → → (Build to 100%)
Amascut
Be 3+  stacks
→ + → → → → → → →  → → → → →
→ s Don't let this hit → ( ) → → →
 →
 → → → → → → → → → ( → )
Notes:
⬥ If wasn't done on P1 do → → →
⬥  mostly skipped:
 /

⬥ not skipped: build to 
Phase 4
In Role throw into portal, Out Role throw onto
→ (if below 73% ) → → → → → → while spawn → (tc ) + throw on + (tc )
(tc ) + → → to kill → inside
Out Role throw 1 + inside
(tc ) + → → → →
Both sides:
Side Chains:
Middle Chain: In / out
Amascut
Out Roles:
utilize  and to
 , if you do the and → instead
Everyone:
Start with at least 2 stack → s → →  → → → → → → → ( ) →
Phase 5
Around the time both solo charges are done and both middle fragments are at 50%, prepare with: → →
As Tumeken's reform starts, move next to Tumeken and wait till 'GET OUT OF MY WAY' → ( ) → → () → → → → → → → improvise
Notes:
⬥ It's important for G1/G2 not to move in front of the boss, until the last interceptor has moved back into charging position, this allows for continuous charging for the fastest phase time and skipping 1 jump.
⬥ All other charging roles need to swap positions with max 1t delay as well for the perfect charge.
⬥ Click middle when charge is 1t off, filled or 1t after filled on the same tick that the green lines appear on the floor.
⬥ Perfect Charge Animation: 150 Charging Method
Phase 6
Non  :
→ → s → → → → ( / → → ) → (tc ) + → move behind → + → → → →  (+ ) → As her second arm stops moving +
 → → ( ) → → → → → → → → before phase*
Jump Rotation:
Click → (tc ) + → (tc ) + → (tc ) + → (tc ) + → → Click → Down
(tc ) + → → → → → → → → → → → → → (+ ) → → before phase
 Mid GCD) →
Example Kills
⬥ R/M 2k 07:01 and 07:03 Examples