Melee Camp Hard Mode Zemouregal & Vorkath
AI-assisted additive formatting; current PvME source words, order and media preserved |
Update source attribution; preserve PvME guide content |
||
| (2 intermediate revisions by the same user not shown) | |||
| Line 33: | Line 33: | ||
<nowiki> | <nowiki> | ||
</nowiki> | </nowiki> | ||
<p class="pvme-source-line"><nowiki>⬥ </nowiki>[https://presets.pvme.io/?id=3d8cabf4-4985-47c2-93ce-27465be6aca5 <nowiki>Method 1</nowiki>]<nowiki> </nowiki><pvme-image src="https://cdn.discordapp.com/emojis/1096130867279171706.png?v=1" alt="melee" title="melee" kind="icon" /></p> | <p class="pvme-source-line"><nowiki>⬥ </nowiki>[https://presets.pvme.io/?id=3d8cabf4-4985-47c2-93ce-27465be6aca5 <nowiki>Method 1</nowiki>]<nowiki> </nowiki><pvme-image src="https://cdn.discordapp.com/emojis/1096130867279171706.png?v=1" alt="melee" title="melee" kind="icon" /><pvme-image src="https://pvme.io/preset-maker-storage/embeds/images/26435ca5e6aae671e2790dc0b3f09b3d7ac4a81407f1e25768f9a9c2c2b0bdfd.webp" alt="HM Vorkath Flightskip Melee only" kind="addition" /></p> | ||
<nowiki> | <nowiki> | ||
</nowiki> | </nowiki> | ||
| Line 270: | Line 270: | ||
</div> | </div> | ||
<div class="pvme-source-attribution">[https://pvme.io/pvme-guides/rs3-full-boss-guides/vorkath/melee-vorkath/ PvME source] · PvME contributors · [https://creativecommons.org/licenses/by-nc-sa/4.0/ CC BY-NC-SA 4.0] | <div class="pvme-source-attribution">[https://pvme.io/pvme-guides/rs3-full-boss-guides/vorkath/melee-vorkath/ PvME source] · PvME contributors · [https://creativecommons.org/licenses/by-nc-sa/4.0/ CC BY-NC-SA 4.0]. | ||
</div> | </div> | ||
Latest revision as of 02:38, 16 November 2026
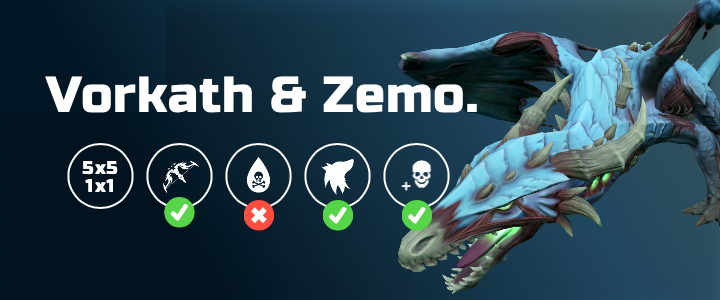
Melee Camp Hard Mode Zemouregal & Vorkath
Introduction
This is an advanced guide which assumes a strong underlying knowledge of all mechanics, and will go over how to quickly kill Zemouregal & Vorkath with  only.
This is a strong option that can achieve 30+ kph without hybridding, and can comfortably achieve the Grandmaster timer while style camping.


Method 1
⬥ Apply  at bank for

⬥ Utilize  for reduced damage from
 and minions,
 is a viable alternative familiar if struggling.
⬥  or

 can be taken.
War's Retreat

 → s
 → enter portal
Fort Forinthry
 while Fort textures loading → claim loot and rejoin instance →
 + click door → again when 0:00 visible on boss timer
Vorkath
 to Zemouregal → (tc) +
 → target + s
 →
 +
 + equip


 →
 →
 + 1t
 →
 →
 → →
 → →
 → + away from spikes → → → → / →
Zemouregal
Two rotation options are provided using either + or
Using +
→  +
 → → →
 on Zemouregal → stall w/basics until less than 10 sec left on cooldown → on to phase below 765k + equip
once available → target Zemouregal + s → + + equip → → s → r + →  → +
 → → →
 → → /
 → /

Using
on Zemouregal → stall w/basics until less than 10 sec left on cooldown → on to phase below 765k
target Zemouregal +  → → + 2t → → → → → → → → + → → → → →
Notes:
⬥ Loading into Fort Forinthry is very intensive. Reducing draw distance and turning off textures can reduce load times.
⬥ is required since this rotation does not skip Zemouregal's 
⬥ Hit chance on Zemouregal is very tight under . If brewed down at all or without maximum accuracy, is necessary to maintain 100% hitchance.
⬥ It is extremely important to control damage to not overphase Vorkath below 765k into flight phase while there is significant >13 sec cooldown remaining. If this happens, the chance of a successful kill is low.
⬥ Activate 2-3 ticks into the first . Do not activate a 2nd until after Vorkath departs for flight.
Method 2
⬥ This rotation uses Equilibrium 4 
⬥ Being on task is not required.
⬥ You need to flick  to maintain LP with

• May use  and instead.
War's Retreat
→ (equip ) + 
Fort Forinthry
+ + claim + instance → + enter door +
Vorkath
(tc) + + → + 1t → → click Zemouregal + → click + (equip ) → → 3t → → → →
+ → → → 
 →
 →
 →
 → → → basics until 764k phased
Zemouregal
(equip + ) build to 120 adren →
→ any defensive → → → → → + → → → → → → → improv