Low Effort Rasial, The First Necromancer
imported>PvME corpus import Attributed pinned PvME snapshot 074a9438f79d10fba75735791be0030734db8b5e; CC BY-NC-SA 4.0 |
Update source attribution; preserve PvME guide content |
||
| (One intermediate revision by the same user not shown) | |||
| Line 1: | Line 1: | ||
__NOTOC__ | |||
<div class="pvme-exact-guide"> | |||
< | <h1 id="low-effort-rasial-the-first-necromancer" class="pvme-source-title"><nowiki>Low Effort Rasial, The First Necromancer</nowiki></h1> | ||
<nowiki> | |||
</nowiki> | |||
<p class="pvme-source-line"><pvme-image src="https://img.pvme.io/images/D6M7KtAfBS.png" alt="" title="" kind="media" /></p> | |||
<nowiki> | <nowiki> | ||
</nowiki><p><nowiki></nowiki></p> | </nowiki> | ||
<p class="pvme-source-line pvme-source-spacer"><nowiki></nowiki></p> | |||
<nowiki> | <nowiki> | ||
</nowiki><h2 id="disclaimer"><ins><nowiki>Disclaimer</nowiki></ins></h2> | </nowiki> | ||
<div class="pvme-source-section"> | |||
<h2 id="disclaimer"><ins><nowiki>Disclaimer</nowiki></ins></h2> | |||
<nowiki> | <nowiki> | ||
</nowiki><p><nowiki>⬥ </nowiki><strong><nowiki>IF YOU CANNOT GET A METHOD TO WORK </nowiki><ins><nowiki>DO NOT</nowiki></ins><nowiki> MESSAGE THE CREATOR(S)</nowiki></strong></p> | </nowiki> | ||
<p class="pvme-source-line"><nowiki>⬥ </nowiki><strong><nowiki>IF YOU CANNOT GET A METHOD TO WORK </nowiki><ins><nowiki>DO NOT</nowiki></ins><nowiki> MESSAGE THE CREATOR(S)</nowiki></strong></p> | |||
<nowiki> | <nowiki> | ||
</nowiki><p><nowiki> • It is </nowiki><strong><nowiki>more than likely </nowiki><ins><nowiki>user error</nowiki></ins><nowiki> or </nowiki><ins><nowiki>cutting corners</nowiki></ins></strong><nowiki>, use </nowiki> | </nowiki> | ||
<p class="pvme-source-line pvme-source-detail"><nowiki> • It is </nowiki><strong><nowiki>more than likely </nowiki><ins><nowiki>user error</nowiki></ins><nowiki> or </nowiki><ins><nowiki>cutting corners</nowiki></ins></strong><nowiki>, use </nowiki><span><nowiki>#pvm-help</nowiki></span><nowiki> if you cannot get it to work</nowiki></p> | |||
<nowiki> | <nowiki> | ||
</nowiki><p><nowiki></nowiki></p> | </nowiki> | ||
<p class="pvme-source-line pvme-source-spacer"><nowiki></nowiki></p> | |||
<nowiki> | <nowiki> | ||
</nowiki><h3 id="positioning"><nowiki>Positioning</nowiki></h3> | </nowiki> | ||
<div class="pvme-source-mechanic"> | |||
<h3 id="positioning"><nowiki>Positioning</nowiki></h3> | |||
<nowiki> | <nowiki> | ||
</nowiki><p> | </nowiki> | ||
<p class="pvme-source-line"><pvme-image src="https://img.pvme.io/images/whWJgbMVzz.png" alt="" title="" kind="media" /><nowiki> | |||
</nowiki></p> | </nowiki></p> | ||
<nowiki> | <nowiki> | ||
</nowiki><h2 id="necromancy-low-effort-method-20-kph"><ins><nowiki>Necromancy Low Effort Method (20+ kph)</nowiki></ins><nowiki> </nowiki> | </nowiki> | ||
</div> | |||
</div> | |||
<div class="pvme-source-section"> | |||
<h2 id="necromancy-low-effort-method-20-kph"><ins><nowiki>Necromancy Low Effort Method (20+ kph)</nowiki></ins><nowiki> </nowiki><pvme-image src="https://cdn.discordapp.com/emojis/1148995625896120460.png?v=1" alt="necromancy" title="necromancy" kind="icon" /></h2> | |||
<nowiki> | <nowiki> | ||
</nowiki><h3 id="overview"><nowiki>Overview</nowiki></h3> | </nowiki> | ||
<div class="pvme-source-mechanic"> | |||
<h3 id="overview"><nowiki>Overview</nowiki></h3> | |||
<nowiki> | <nowiki> | ||
</nowiki><div><nowiki> | </nowiki> | ||
<div><nowiki> | |||
</nowiki><div><nowiki> | </nowiki><div><nowiki> | ||
</nowiki><div><nowiki> | </nowiki><div><nowiki> | ||
| Line 34: | Line 57: | ||
</nowiki><div><nowiki> | </nowiki><div><nowiki> | ||
</nowiki><div></div> | </nowiki><div style="background-color: rgb(0, 153, 255)"></div><nowiki> | ||
<nowiki> | |||
</nowiki><div><nowiki> | </nowiki><div><nowiki> | ||
</nowiki><div><nowiki> | </nowiki><div><nowiki> | ||
| Line 41: | Line 63: | ||
</nowiki><div | </nowiki><div class="pvme-source-preserve-lines"><nowiki>⬥ The following </nowiki><strong><nowiki>ARE REQUIRED</nowiki></strong><nowiki> for this method to work: | ||
• </nowiki><strong><nowiki>Cutting corners will result in failure</nowiki></strong><nowiki> | • </nowiki><strong><nowiki>Cutting corners will result in failure</nowiki></strong><nowiki> | ||
• A more extensive list can be found in </nowiki> | • A more extensive list can be found in </nowiki><span><nowiki>#unknown-channel</nowiki></span><nowiki> | ||
</nowiki></div> | </nowiki></div><nowiki> | ||
<nowiki> | |||
</nowiki><div><div><div><u><nowiki>Items</nowiki></u><nowiki> | </nowiki><div><div><div><u><nowiki>Items</nowiki></u><nowiki> | ||
</nowiki></div> | </nowiki></div><div class="pvme-source-preserve-lines"><nowiki>⬥ At least 4 pieces of the </nowiki>[https://runescape.wiki/w/First_Necromancer%27s_equipment <nowiki>First Necromancer's equipment</nowiki>]<nowiki> </nowiki><pvme-image src="https://cdn.discordapp.com/emojis/1206671120623870013.png?v=1" alt="firstnecrocrown" title="firstnecrocrown" kind="icon" /><nowiki> | ||
<div | ⬥ </nowiki>[https://runescape.wiki/w/Zemouregal%27s_nexus <nowiki>Zemouregal's Nexus</nowiki>]<nowiki> </nowiki><pvme-image src="https://cdn.discordapp.com/emojis/1179716261681307728.png?v=1" alt="zemouregalsnexus" title="zemouregalsnexus" kind="icon" /><nowiki> | ||
⬥ </nowiki>[https://runescape.wiki/w/Zemouregal%27s_nexus <nowiki>Zemouregal's Nexus</nowiki>]<nowiki> </nowiki> | |||
• Deathwarden Nexus may not be as consistent | • Deathwarden Nexus may not be as consistent | ||
• </nowiki><strong><nowiki>Do NOT use The Devourer's Nexus. Using this will result in failure.</nowiki></strong><nowiki> | • </nowiki><strong><nowiki>Do NOT use The Devourer's Nexus. Using this will result in failure.</nowiki></strong><nowiki> | ||
</nowiki></div> | </nowiki></div></div><div><div><u><nowiki>Perks</nowiki></u><nowiki> | ||
</div> | </nowiki></div><div class="pvme-source-preserve-lines"><nowiki>⬥ </nowiki>[https://runescape.wiki/w/Robe_top_of_the_First_Necromancer <nowiki>Robe Top of the First Necromancer</nowiki>]<nowiki> </nowiki><pvme-image src="https://cdn.discordapp.com/emojis/1206664820682657822.png?v=1" alt="firstnecrorobetop" title="firstnecrorobetop" kind="icon" /><nowiki> | ||
<div><div><u><nowiki>Perks</nowiki></u><nowiki> | • </nowiki>[https://runescape.wiki/w/Ultimatums <nowiki>Ultimatums 4</nowiki>]<nowiki> </nowiki><pvme-image src="https://cdn.discordapp.com/emojis/1478090603026710648.png?v=1" alt="ultimatums4" title="ultimatums4" kind="icon" /><nowiki> + </nowiki>[https://runescape.wiki/w/Crackling <nowiki>Crackling 4</nowiki>]<nowiki> </nowiki><pvme-image src="https://cdn.discordapp.com/emojis/712073087662686249.png?v=1" alt="crack4" title="crack4" kind="icon" /><nowiki> | ||
</nowiki></div> | • </nowiki>[https://runescape.wiki/w/Equilibrium <nowiki>Equilibrium 4</nowiki>]<nowiki> </nowiki><pvme-image src="https://cdn.discordapp.com/emojis/712073088589627505.png?v=1" alt="eq4" title="eq4" kind="icon" /><nowiki> | ||
<div | ⬥ </nowiki>[https://runescape.wiki/w/Masterwork_magic_robe_bottom <nowiki>Masterwork Legs</nowiki>]<nowiki> </nowiki><pvme-image src="https://cdn.discordapp.com/emojis/1388314906671059015.png?v=1" alt="mwmrobebottom" title="mwmrobebottom" kind="icon" /><nowiki> / </nowiki><pvme-image src="https://cdn.discordapp.com/emojis/1487224419888664587.png?v=1" alt="mwrchaps" title="mwrchaps" kind="icon" /><nowiki> | ||
• </nowiki>[https://runescape.wiki/w/Ultimatums <nowiki>Ultimatums 4</nowiki>]<nowiki> </nowiki> | • </nowiki>[https://runescape.wiki/w/Absorbative <nowiki>Absorbative 4</nowiki>]<nowiki> </nowiki><pvme-image src="https://cdn.discordapp.com/emojis/890542428556230666.png?v=1" alt="absorbative4" title="absorbative4" kind="icon" /><nowiki> | ||
• </nowiki>[https://runescape.wiki/w/Equilibrium <nowiki>Equilibrium 4</nowiki>]<nowiki> </nowiki> | • </nowiki>[https://runescape.wiki/w/Lucky <nowiki>Lucky 6</nowiki>]<nowiki> </nowiki><pvme-image src="https://cdn.discordapp.com/emojis/890542428287795221.png?v=1" alt="lucky6" title="lucky6" kind="icon" /><nowiki> + </nowiki>[https://runescape.wiki/w/Undead_Slayer <nowiki>Undead Slayer</nowiki>]<nowiki> </nowiki><pvme-image src="https://cdn.discordapp.com/emojis/689502804720615441.png?v=1" alt="undeadslayerperk" title="undeadslayerperk" kind="icon" /><nowiki> | ||
⬥ </nowiki>[https://runescape.wiki/w/Masterwork_magic_robe_bottom <nowiki>Masterwork Legs</nowiki>]<nowiki> </nowiki> | </nowiki></div></div><div><div><u><nowiki>Abilities</nowiki></u><nowiki> | ||
• </nowiki>[https://runescape.wiki/w/Absorbative <nowiki>Absorbative 4</nowiki>]<nowiki> </nowiki> | </nowiki></div><div class="pvme-source-preserve-lines"><nowiki>⬥ </nowiki>[https://runescape.wiki/w/Conjure_Undead_Army <nowiki>Conjure Undead Army</nowiki>]<nowiki> </nowiki><pvme-image src="https://cdn.discordapp.com/emojis/1166094935066423348.png?v=1" alt="conjurearmy" title="conjurearmy" kind="icon" /><nowiki> | ||
• </nowiki>[https://runescape.wiki/w/Lucky <nowiki>Lucky 6</nowiki>]<nowiki> </nowiki> | |||
</nowiki></div> | |||
</div> | |||
<div><div><u><nowiki>Abilities</nowiki></u><nowiki> | |||
</nowiki></div> | |||
<div | |||
• Have all 4 conjures selected | • Have all 4 conjures selected | ||
⬥ </nowiki>[https://runescape.wiki/w/Greater_Bone_Shield <nowiki>Greater Bone Shield</nowiki>]<nowiki> </nowiki> | ⬥ </nowiki>[https://runescape.wiki/w/Greater_Bone_Shield <nowiki>Greater Bone Shield</nowiki>]<nowiki> </nowiki><pvme-image src="https://cdn.discordapp.com/emojis/1137809118283976814.png?v=1" alt="greaterboneshield" title="greaterboneshield" kind="icon" /><nowiki> | ||
</nowiki></div> | </nowiki></div></div><div><div><u><nowiki>Other</nowiki></u><nowiki> | ||
</div> | </nowiki></div><div class="pvme-source-preserve-lines"><nowiki>⬥ </nowiki>[https://runescape.wiki/w/Vampyrism <nowiki>Vampyrism aspect</nowiki>]<nowiki> </nowiki><pvme-image src="https://cdn.discordapp.com/emojis/1494069423047442573.png?v=1" alt="vampyrismaspect" title="vampyrismaspect" kind="icon" /><nowiki> | ||
<div><div><u><nowiki>Other</nowiki></u><nowiki> | |||
</nowiki></div> | |||
<div | |||
• Can be multi-cast to last 60 minutes | • Can be multi-cast to last 60 minutes | ||
⬥ Pray </nowiki> | ⬥ Pray </nowiki><pvme-image src="https://cdn.discordapp.com/emojis/615613924506599497.png?v=1" alt="soulsplit" title="soulsplit" kind="icon" /><nowiki> and </nowiki><pvme-image src="https://cdn.discordapp.com/emojis/1137940996391452772.png?v=1" alt="ruination" title="ruination" kind="icon" /><nowiki> | ||
• </nowiki> | • </nowiki><pvme-image src="https://cdn.discordapp.com/emojis/1137941003895046284.png?v=1" alt="sorrow" title="sorrow" kind="icon" /><nowiki> may not be as consistent | ||
⬥ </nowiki>[https://runescape.wiki/w/Hellhound_(familiar) <nowiki>Hellhound</nowiki>]<nowiki> </nowiki> | ⬥ </nowiki>[https://runescape.wiki/w/Hellhound_(familiar) <nowiki>Hellhound</nowiki>]<nowiki> </nowiki><pvme-image src="https://cdn.discordapp.com/emojis/921410226475925514.png?v=1" alt="hellhoundpouch" title="hellhoundpouch" kind="icon" /><nowiki> | ||
⬥ </nowiki>[https://runescape.wiki/w/Bonfire_Boost_Active <nowiki>Bonfire Boost</nowiki>]<nowiki> </nowiki> | ⬥ </nowiki>[https://runescape.wiki/w/Bonfire_Boost_Active <nowiki>Bonfire Boost</nowiki>]<nowiki> </nowiki><pvme-image src="https://cdn.discordapp.com/emojis/1011705727041163396.png?v=1" alt="firemaking" title="firemaking" kind="icon" /><nowiki> and </nowiki>[https://runescape.wiki/w/Ogre_flask_(thermal) <nowiki>Ogre flask (thermal)</nowiki>]<nowiki> </nowiki><pvme-image src="https://cdn.discordapp.com/emojis/689530593796423724.png?v=1" alt="thermalflask" title="thermalflask" kind="icon" /><nowiki> | ||
• Wear HP boosting equipment | • Wear HP boosting equipment | ||
• </nowiki>[https://runescape.wiki/w/Totem_of_Vitality <nowiki>Totem of Vitality</nowiki>]<nowiki> </nowiki> | • </nowiki>[https://runescape.wiki/w/Totem_of_Vitality <nowiki>Totem of Vitality</nowiki>]<nowiki> </nowiki><pvme-image src="https://cdn.discordapp.com/emojis/643507594811670538.png?v=1" alt="vitalitytotem" title="vitalitytotem" kind="icon" /><nowiki> preferred over Bonfire </nowiki><pvme-image src="https://cdn.discordapp.com/emojis/1011705727041163396.png?v=1" alt="firemaking" title="firemaking" kind="icon" /><nowiki> | ||
⬥ Teleporting to </nowiki>[https://runescape.wiki/w/War%27s_Retreat <nowiki>War's Retreat</nowiki>]<nowiki> after every kill to replenish prayer, adrenaline, familiar and player health, and reset cooldowns. | ⬥ Teleporting to </nowiki>[https://runescape.wiki/w/War%27s_Retreat <nowiki>War's Retreat</nowiki>]<nowiki> after every kill to replenish prayer, adrenaline, familiar and player health, and reset cooldowns. | ||
</nowiki></div> | </nowiki></div></div></div><nowiki> | ||
</div> | </nowiki></div><nowiki> | ||
</div> | |||
<nowiki> | </nowiki></div><nowiki> | ||
</nowiki></div> | |||
</nowiki></div></div></div></div></div></div></div></div></div></div></div></div> | |||
<nowiki> | <nowiki> | ||
</nowiki></ | </nowiki> | ||
<p class="pvme-source-line pvme-source-spacer"><nowiki></nowiki></p> | |||
<nowiki> | <nowiki> | ||
</nowiki> | |||
</div> | </div> | ||
</div> | </div> | ||
<div class="pvme-source-section" data-gear="true"> | |||
<h2 id="presets-and-relics"><ins><nowiki>Presets and Relics</nowiki></ins></h2> | |||
<nowiki> | <nowiki> | ||
</nowiki> | |||
</nowiki>< | <p class="pvme-source-line"><nowiki>⬥ </nowiki>[https://presets.pvme.io/?id=2cae567e-4902-4dc7-83da-fe1eca8e3076 <nowiki>Necromancy preset</nowiki>]<nowiki> </nowiki><pvme-image src="https://cdn.discordapp.com/emojis/1148995625896120460.png?v=1" alt="necromancy" title="necromancy" kind="icon" /></p> | ||
<nowiki> | <nowiki> | ||
</nowiki>< | </nowiki> | ||
<p class="pvme-source-line"><nowiki> | |||
</nowiki><pvme-image src="https://firebasestorage.googleapis.com/v0/b/preset-images/o/images%2F2cae567e-4902-4dc7-83da-fe1eca8e3076.png?alt=media" alt="" title="" kind="media" /></p> | |||
<nowiki> | <nowiki> | ||
</nowiki>< | </nowiki> | ||
<div class="pvme-source-mechanic"> | |||
<h3 id="action-bar"><nowiki>Action Bar</nowiki></h3> | |||
<nowiki> | <nowiki> | ||
</nowiki> | </nowiki> | ||
< | <p class="pvme-source-line"><pvme-image src="https://img.pvme.io/images/iHFynKkc42.png" alt="" title="" kind="media" /><nowiki> | ||
</nowiki></p> | </nowiki></p> | ||
<nowiki> | <nowiki> | ||
</nowiki><h3 id="the-fight"><nowiki>The fight</nowiki></h3> | </nowiki> | ||
</div> | |||
<div class="pvme-source-mechanic"> | |||
<h3 id="the-fight"><nowiki>The fight</nowiki></h3> | |||
<nowiki> | <nowiki> | ||
</nowiki><p><nowiki>⬥ Rejoin instance → </nowiki> | </nowiki> | ||
<p class="pvme-source-line pvme-source-sequence"><nowiki>⬥ Rejoin instance → </nowiki><pvme-image src="https://cdn.discordapp.com/emojis/535533810004262912.png?v=1" alt="surge" title="surge" kind="icon" /><nowiki> or </nowiki><pvme-image src="https://cdn.discordapp.com/emojis/1049378668197195808.png?v=1" alt="dive" title="dive" kind="icon" /><nowiki> to the starting position → </nowiki><pvme-image src="https://cdn.discordapp.com/emojis/938475261366784070.png?v=1" alt="prismofrestoration" title="prismofrestoration" kind="icon" /><nowiki> → </nowiki><pvme-image src="https://cdn.discordapp.com/emojis/1137809121983336548.png?v=1" alt="invokedeath" title="invokedeath" kind="icon" /><nowiki> → use </nowiki><pvme-image src="https://cdn.discordapp.com/emojis/655341074235129858.png?v=1" alt="vulnbomb" title="vulnbomb" kind="icon" /><nowiki> at the start of the fight.</nowiki></p> | |||
<nowiki> | <nowiki> | ||
</nowiki><p><nowiki> • In rare cases, you may die</nowiki></p> | </nowiki> | ||
<p class="pvme-source-line pvme-source-detail"><nowiki> • In rare cases, you may die</nowiki></p> | |||
<nowiki> | <nowiki> | ||
</nowiki><p><nowiki></nowiki></p> | </nowiki> | ||
<p class="pvme-source-line pvme-source-spacer"><nowiki></nowiki></p> | |||
<nowiki> | <nowiki> | ||
</nowiki><h3 id="example-kills"><nowiki>Example Kills</nowiki></h3> | </nowiki> | ||
</div> | |||
<div class="pvme-source-mechanic"> | |||
<h3 id="example-kills"><nowiki>Example Kills</nowiki></h3> | |||
<nowiki> | <nowiki> | ||
</nowiki><p><nowiki>⬥ </nowiki>[https://www.youtube.com/watch?v=8fnFe22mVCQ <nowiki>Necromancy Low Effort</nowiki>]</p> | </nowiki> | ||
<p class="pvme-source-line"><nowiki>⬥ </nowiki>[https://www.youtube.com/watch?v=8fnFe22mVCQ <nowiki>Necromancy Low Effort</nowiki>]</p> | |||
<nowiki> | <nowiki> | ||
</nowiki><p><nowiki></nowiki></p> | </nowiki> | ||
<p class="pvme-source-line pvme-source-spacer"><nowiki></nowiki></p> | |||
<nowiki> | <nowiki> | ||
</nowiki> | </nowiki> | ||
</div> | |||
</div> | |||
</div> | |||
<div class="pvme-source-attribution">[https://pvme.io/pvme-guides/afk/low-effort-rasial/ PvME source] · PvME contributors · [https://creativecommons.org/licenses/by-nc-sa/4.0/ CC BY-NC-SA 4.0]. | |||
</div> | |||
Latest revision as of 02:35, 16 November 2026
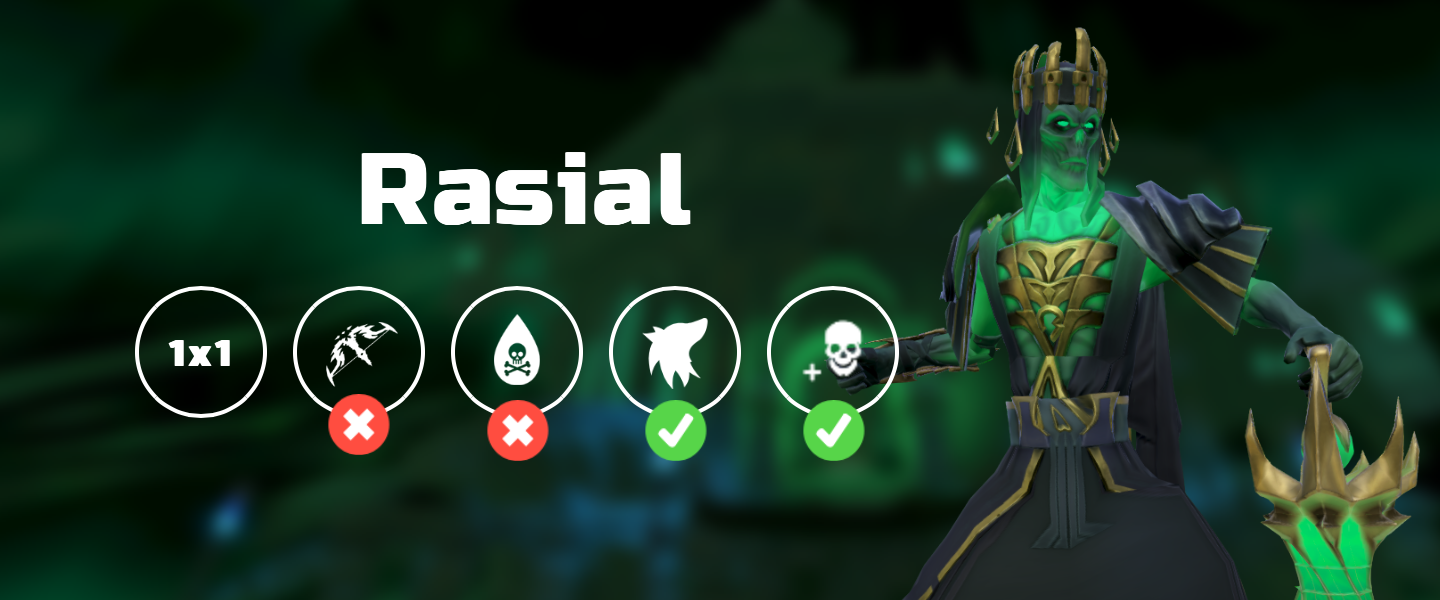
Low Effort Rasial, The First Necromancer
Disclaimer
⬥ IF YOU CANNOT GET A METHOD TO WORK DO NOT MESSAGE THE CREATOR(S)
• It is more than likely user error or cutting corners, use #pvm-help if you cannot get it to work
Positioning

Necromancy Low Effort Method (20+ kph) 
Overview
⬥ The following ARE REQUIRED for this method to work:
• Cutting corners will result in failure
• A more extensive list can be found in #unknown-channel
Items
⬥ At least 4 pieces of the First Necromancer's equipment  ⬥ Zemouregal's Nexus
 • Deathwarden Nexus may not be as consistent
• Do NOT use The Devourer's Nexus. Using this will result in failure.
⬥ Zemouregal's Nexus
• Deathwarden Nexus may not be as consistent
• Do NOT use The Devourer's Nexus. Using this will result in failure.
Perks
 •
 +
 •
 ⬥
 /
 •
 •
 +

Abilities
 • Have all 4 conjures selected
⬥

Other
⬥ Vampyrism aspect  • Can be multi-cast to last 60 minutes
⬥ Pray
 and
 •
 may not be as consistent
⬥ Hellhound
 ⬥ Bonfire Boost
 and Ogre flask (thermal)
 • Wear HP boosting equipment
• Totem of Vitality
 preferred over Bonfire
⬥ Teleporting to War's Retreat after every kill to replenish prayer, adrenaline, familiar and player health, and reset cooldowns.
• Can be multi-cast to last 60 minutes
⬥ Pray and
• may not be as consistent
⬥ Hellhound
⬥ Bonfire Boost and Ogre flask (thermal)
• Wear HP boosting equipment
• Totem of Vitality preferred over Bonfire
⬥ Teleporting to War's Retreat after every kill to replenish prayer, adrenaline, familiar and player health, and reset cooldowns.
Presets and Relics

Action Bar

The fight
⬥ Rejoin instance →  or
 to the starting position →
 →
 → use
 at the start of the fight.
• In rare cases, you may die
PvME source · PvME contributors · CC BY-NC-SA 4.0.