Giant Mole (Hard Mode)
AI-assisted additive formatting; current PvME source words, order and media preserved |
Update source attribution; preserve PvME guide content |
||
| Line 112: | Line 112: | ||
</div> | </div> | ||
<div class="pvme-source-attribution">[https://pvme.io/pvme-guides/rs3-full-boss-guides/giant-mole-hm/ PvME source] · PvME contributors · [https://creativecommons.org/licenses/by-nc-sa/4.0/ CC BY-NC-SA 4.0] | <div class="pvme-source-attribution">[https://pvme.io/pvme-guides/rs3-full-boss-guides/giant-mole-hm/ PvME source] · PvME contributors · [https://creativecommons.org/licenses/by-nc-sa/4.0/ CC BY-NC-SA 4.0]. | ||
</div> | </div> | ||
Latest revision as of 02:36, 16 November 2026
Giant Mole (Hard Mode)

Introduction
This is an advanced guide which assumes a strong underlying knowledge of all mechanics and information presented in #giant-mole-basic.

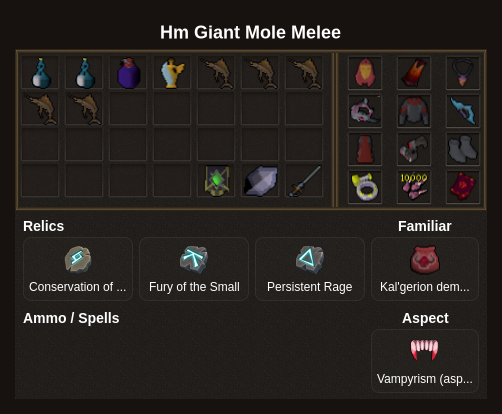
Rotations
⬥ Abyssal Scourge  is required for this method to work
 →
 or wait for 60% adren →
 (giant mole will now dig twice, watch for her 2nd dig location)
 →
 to where the giant mole is positioned
 →
 mini moles inside tunnels on the way to giant mole
→ giant mole will now dig back to starting chamber
 →
 → →

Notes:
⬥ *You may find that if the giant mole digs to the northwestern chamber first, she may not go back to the starting chamber after your
• This is due to the damage reduction mechanic.*
⬥ If this happens you will need to follow her to a 2nd chamber and which will guarantee her to dig to the starting chamber.