Giant Mole HM

Introduction
This is an advanced guide which assumes a strong underlying knowledge of all mechanics and information presented in Giant Mole Basic.
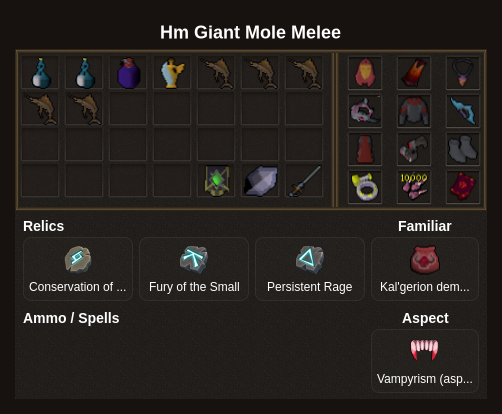
Presets and Relics
⬥ Melee melee Guide illustration

Rotations
⬥ Abyssal Scourge abyssalscourge is required for this method to work

berserk → adrenrenewalflask or wait for 60% adren → overpowerigneous (giant mole will now dig twice, watch for her 2nd dig location)


surgemobile → divemobile to where the giant mole is positioned


adaptivestrike → chaosroar mini moles inside tunnels on the way to giant mole


overpowerigneous → giant mole will now dig back to starting chamber
gbarge → assault → adaptivestrike → punish


Notes:
⬥ *You may find that if the giant mole digs to the northwestern chamber first, she may not go back to the starting chamber after your overpowerigneous
• This is due to the damage reduction mechanic.*
⬥ If this happens you will need to follow her to a 2nd chamber and overpowerigneous which will guarantee her to dig to the starting chamber.
Example Kills
⬥ Example kill - Tz Matt xD melee
Attribution and source history
Adapted from Giant Mole HM by PvME contributors. Upstream source history. Licensed CC BY-NC-SA 4.0. Snapshot 074a9438f79d10fba75735791be0030734db8b5e. Formatting adapted for standalone MediaWiki; media and third-party references remain external links.